Introduction
The HTTP connector can send and receive HTTP and HTTPS requests given a selected host, port, and address. So depending on your needs, you can either:
- Listen for HTTP requests.
- Send HTTP requests.
Through additional configuration, the connector allows you to:
- Use TLS encryption to send or receive HTTPS requests.
- Send Authenticated Requests, via Basic Authentication, Digest, and OAuth.
As HTTP Listener
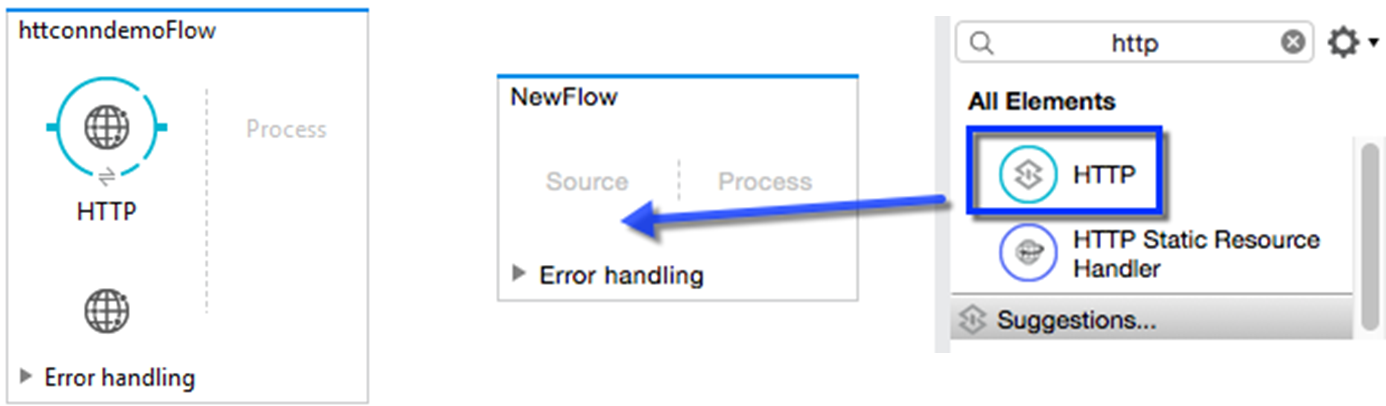
To instantiate the connector as an HTTP listener connector, you must place it onto a blank Anypoint Studio canvas into the Source section of a new flow (as the first element in the flow) as you design your Mule application:

As HTTP Requester
To instantiate the connector as an HTTP request connector, you must place it into the Process section of a flow (anywhere except the beginning of it):

Demonstration
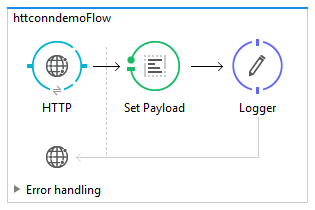
So, now we will see how an HTTP connector works as an HTTP listener. Below is the target flow to be designed for an HTTP connector as a listener:
Step 1: Create a new flow httpconndemoFlow as directed below:
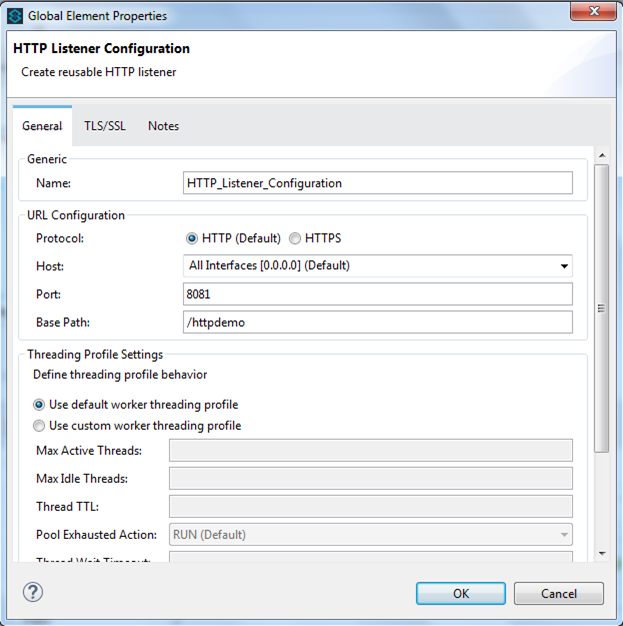
Step 2: Configure the HTTP listener of httpconndemoFlow for the GET method as:
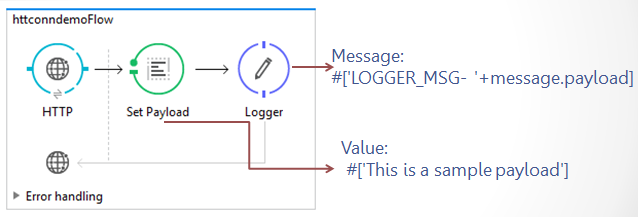
Step 3: Add a set payload transformer and a logger just after it, then add values for the respective fields specified below:
Step 4: Check the XML configuration:
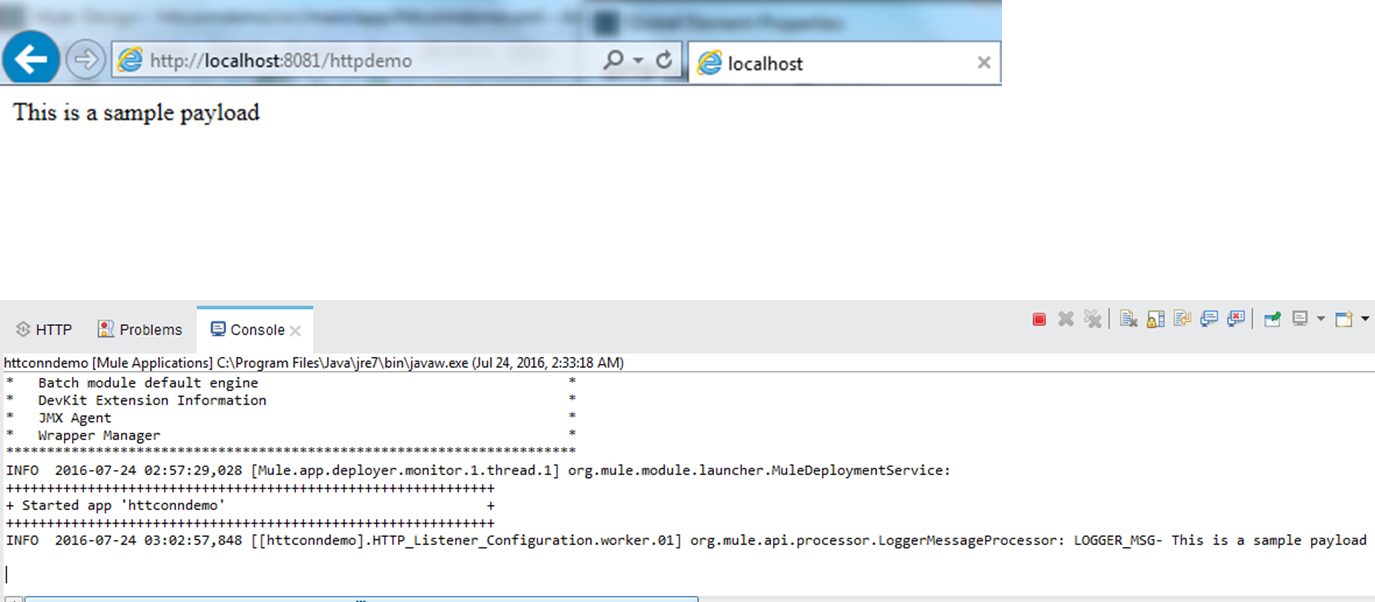
Step 5: Start testing in your browser and check logger messages in the Mule console:
Conclusion
There you have it! We have seen how an HTTP connector works as a listener. Similarly, an HTTP requester can be configured and used the same way.
An HTTP listener can be configured for different HTTP methods — GET, POST, etc. Obviously, I went with the GET method for this demonstration.
Thank you for sharing wonderful information with us to get some idea about it.
ReplyDeleteMuleSoft Online Training
MuleSoft Training in Hyderabad