Saturday, August 6, 2016

Mulesoft- Configuring a File Connector

Introduction

A file connector allows your Mule application to exchange files with a file system. You can implement the connector as an inbound endpoint (such as a message source), or as an outbound endpoint. This endpoint implements a one-way exchange pattern only.

Installation and Configuration

Installation

You can install a connector in Anypoint Studio using the instructions within the program.

Configuration

File endpoint configuration consists of two stages:
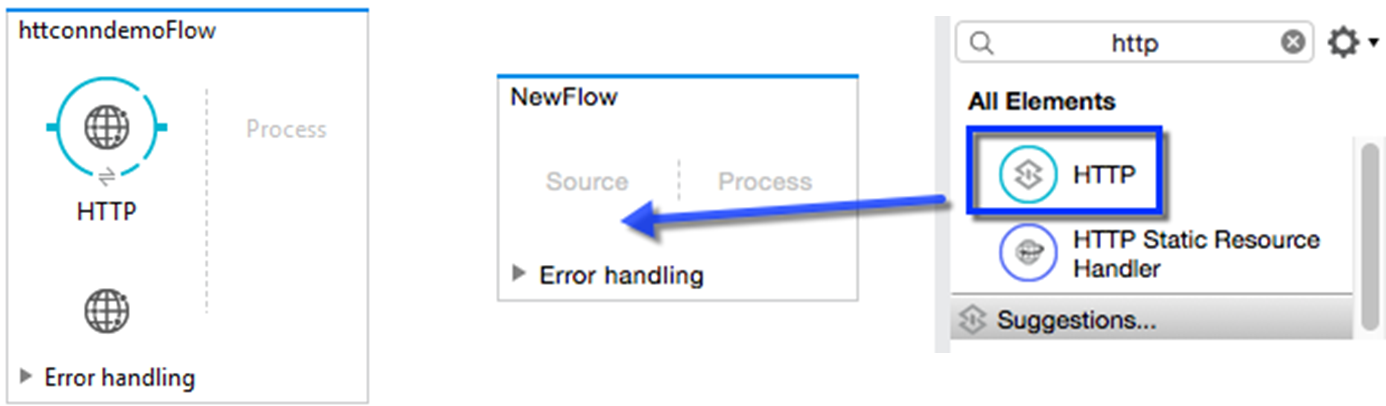
1. Place the file endpoint within the Mule flow you are developing:
    a) If you place the File endpoint at the beginning of the flow, it acts as an inbound endpoint (such as a message source), triggering the flow whenever it receives an incoming file. 
    b) If you place the File building block in the middle or at the end of the flow, it serves as an outbound endpoint, passing files to the connected file system.
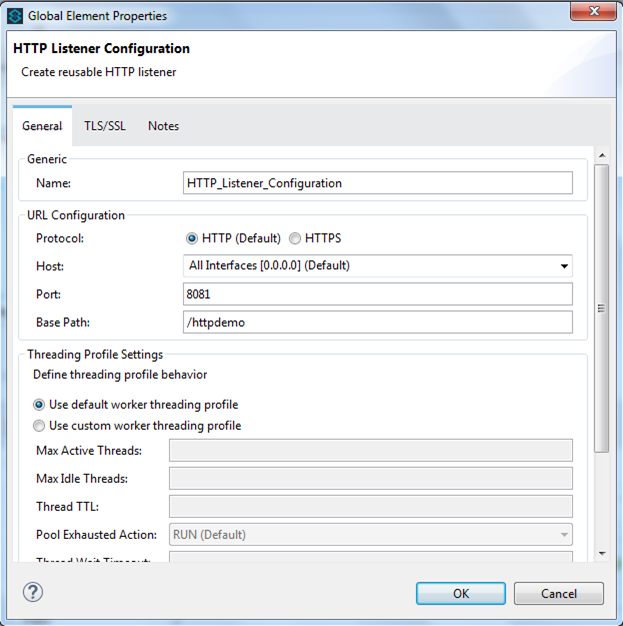
2. Configure the file endpoint by providing values for the fields on the various tabs in the properties editor.
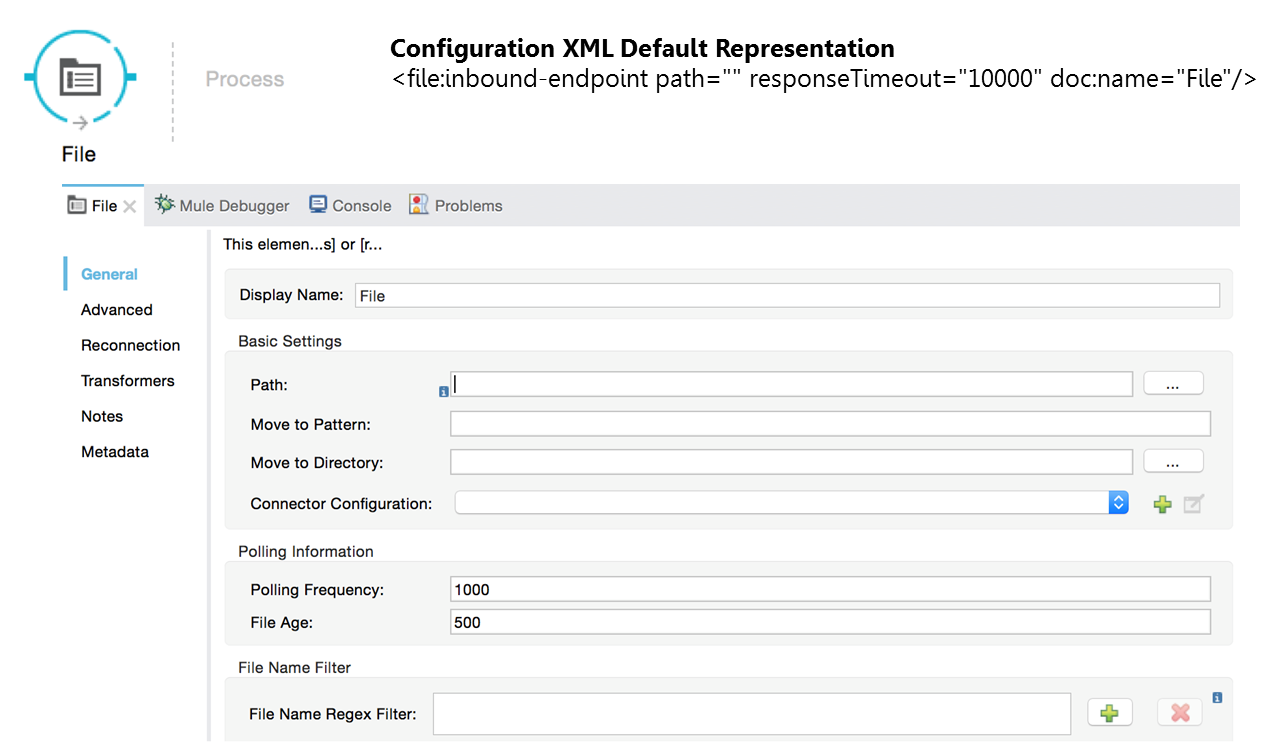
Inbound Endpoint

Let's see a quick snapshot:
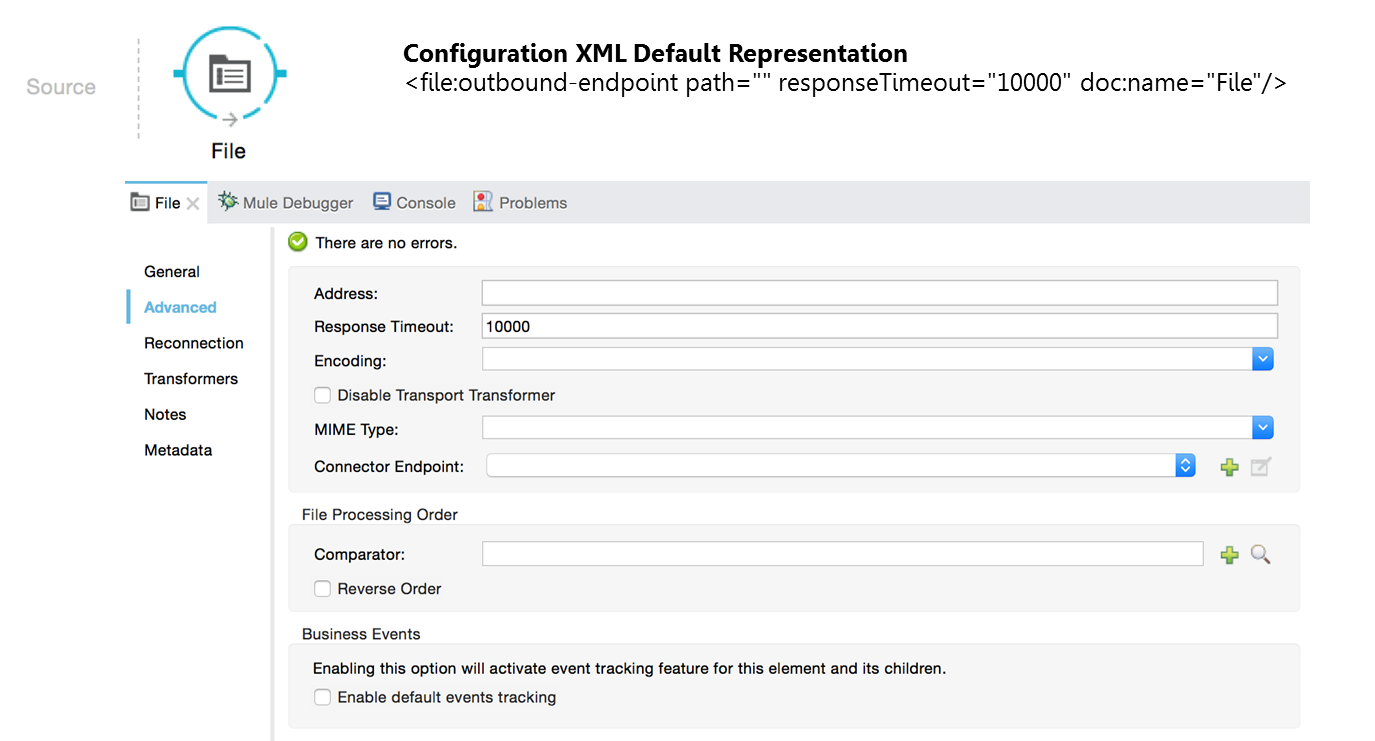
Image title

Outbound Endpoint

Now let's see the snapshot of outbound endpoint:
Image title

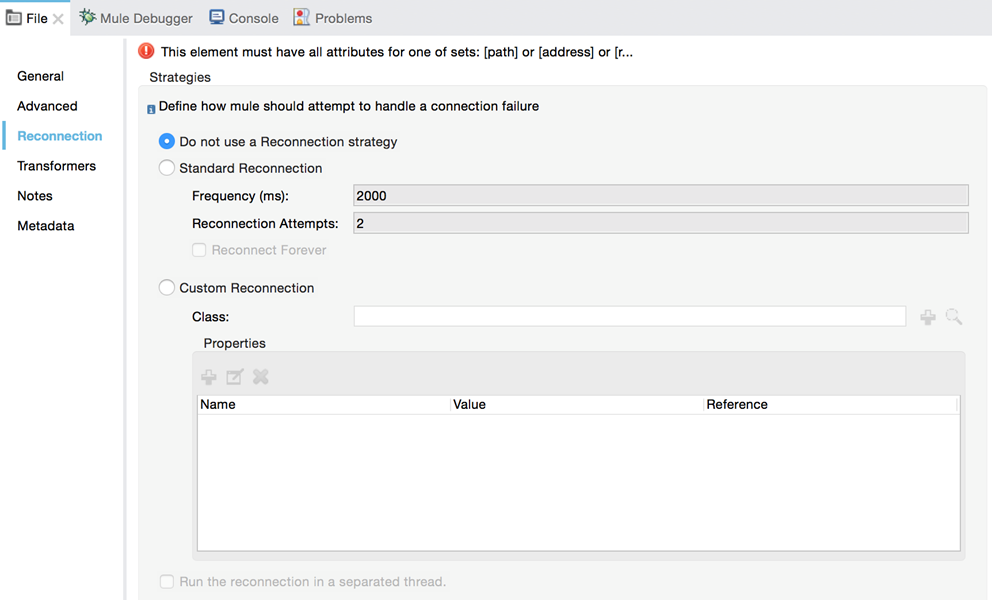
Re-connection Settings

By default, there is no reconnection strategy implemented for you, but you may choose to configure reconnection on a set frequency (standard reconnection) or via a custom reconnection strategy.
Image title

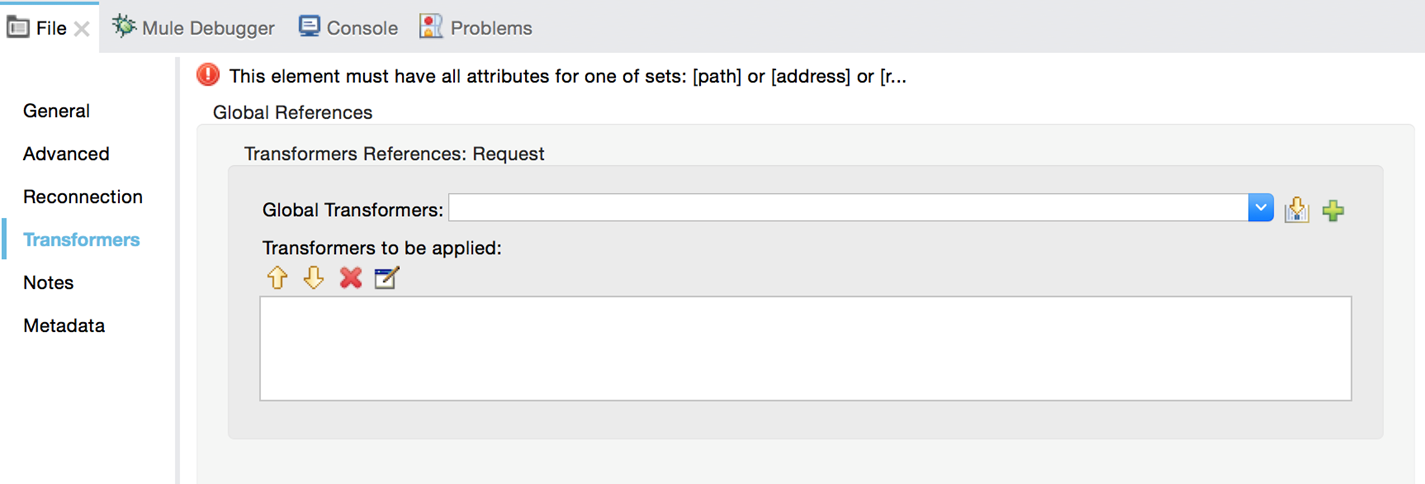
Transformers Settings

The following screengrab gives the brief idea about different settings for transformers:
Image title

Demonstration

Now we'll see how the file connector works.
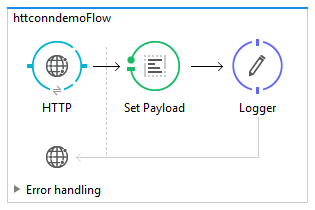
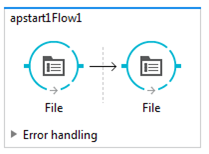
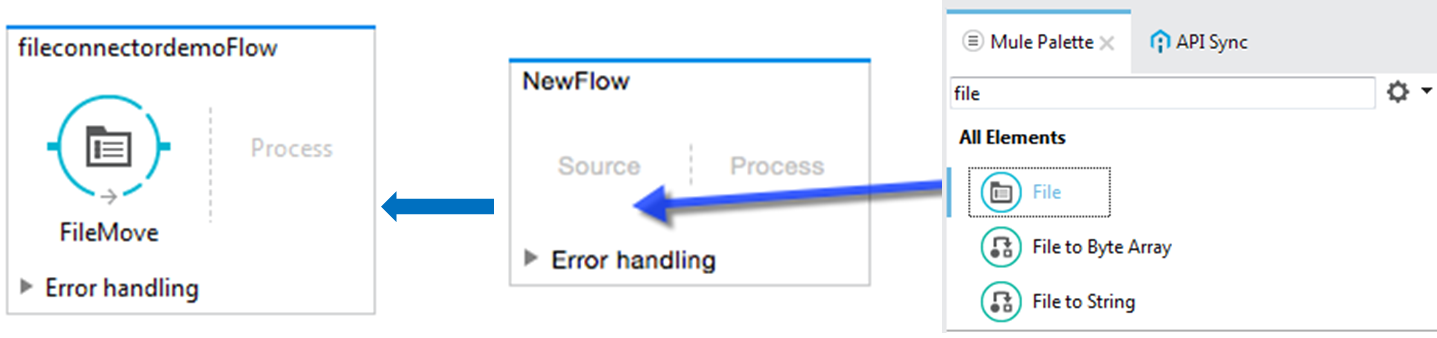
Step 1: Create a new flow fileconnectordemoFlow as directed below:
Image title

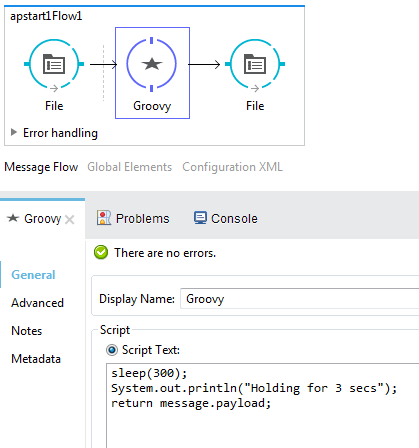
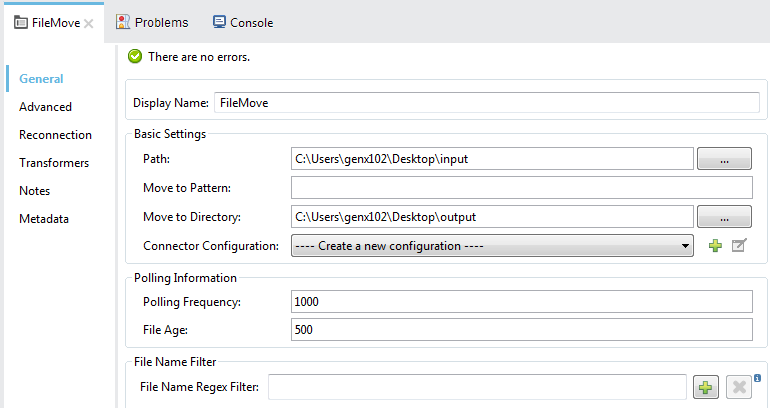
Step 2: Configure the file connector (FileMove) as directed below:
Image title

Step 3: Check the XML configuration file:
<?xml version="1.0" encoding="UTF-8"?>
<mule xmlns="http://www.mulesoft.org/schema/mule/core" version="EE-3.8.0">
    <flow name="fileconnectordemoFlow">
        <file:inbound-endpoint xmlns:file="http://www.mulesoft.org/schema/mule/file" xmlns:doc="http://www.mulesoft.org/schema/mule/documentation" path="C:\Users\genx102\Desktop\input" moveToDirectory="C:\Users\genx102\Desktop\output" responseTimeout="10000" doc:name="FileMove"> </file:inbound-endpoint>
        <logger xmlns:doc="http://www.mulesoft.org/schema/mule/documentation" message="#['FILE_NAME- '+message.inboundProperties.originalFilename],#['FILE_SIZE- '+((message.inboundProperties.fileSize)/1024)+'KB']" level="INFO" doc:name="Logger">   </logger>
    </flow>
</mule>

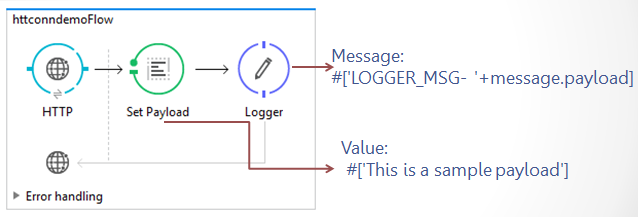
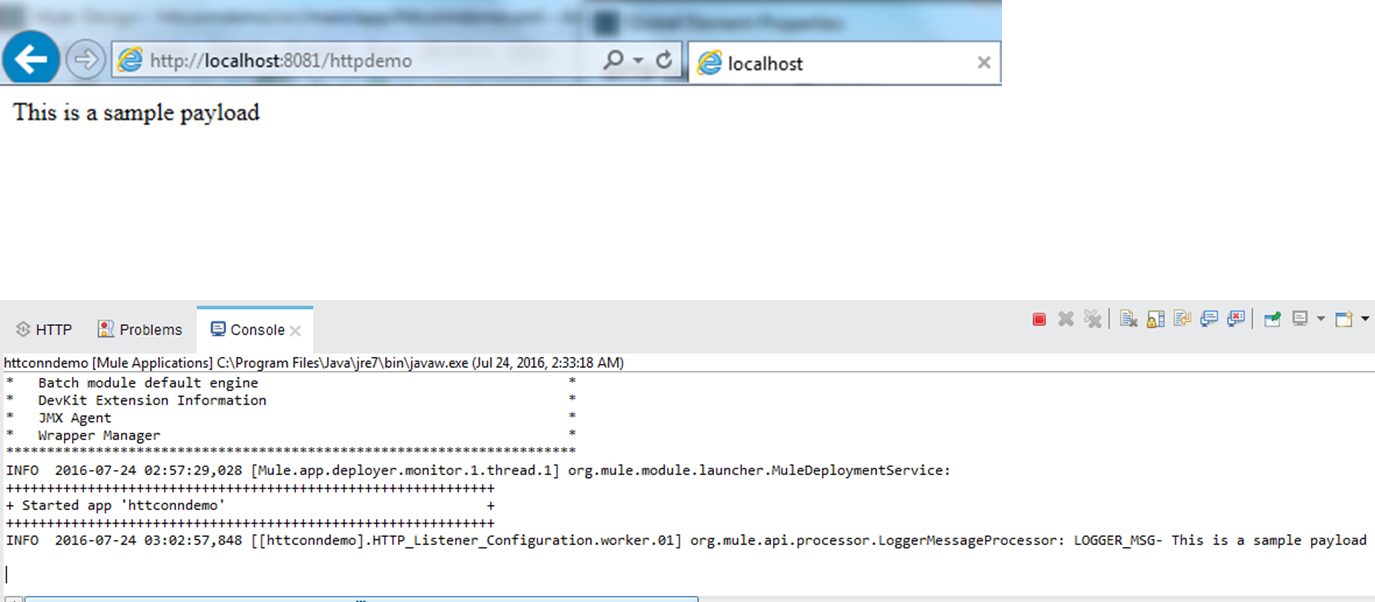
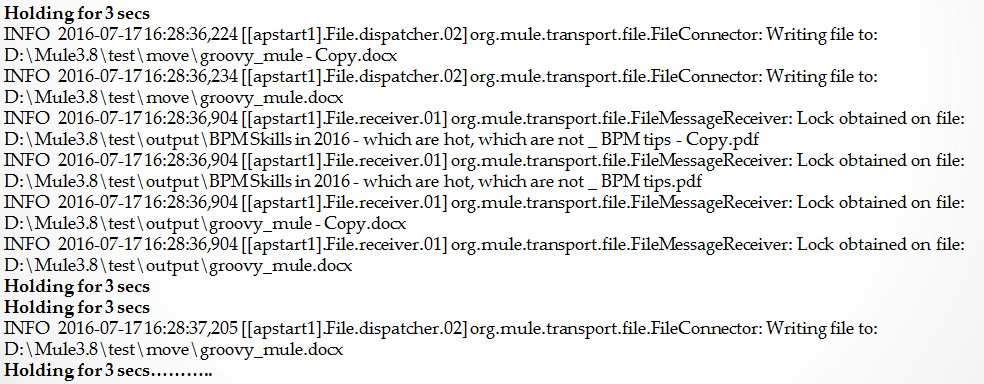
Step 4: Let's run our application to test the file connector functionality. However we'll be able to see the processing in a logger message processor as shown below:
Image title
Also, the files from source directory have been moved to the target location. We can verify the same by checking physical location specified in the file connector source/target.

Conclusion

And that's that. Now, you've seen how file connectors form powerful components within local systems and, more importantly, how to make one yourself.

Mulesoft Configure an HTTP Connector as a Listener

Introduction

The HTTP connector can send and receive HTTP and HTTPS requests given a selected host, port, and address. So depending on your needs, you can either:
  • Listen for HTTP requests.
  • Send HTTP requests.
Through additional configuration, the connector allows you to:
  • Use TLS encryption to send or receive HTTPS requests.
  • Send Authenticated Requests, via Basic Authentication, Digest, and OAuth.

As HTTP Listener       

To instantiate the connector as an HTTP listener connector, you must place it onto a blank Anypoint Studio canvas into the Source section of a new flow (as the first element in the flow) as you design your Mule application:
Image title

As HTTP Requester

To instantiate the connector as an HTTP request connector, you must place it into the Process section of a flow (anywhere except the beginning of it):
Image title

Demonstration

So, now we will see how an HTTP connector works as an HTTP listener. Below is the target flow to be designed for an HTTP connector as a listener:
Image title

Step 1:  Create a new flow httpconndemoFlow as directed below:
Image title

Step 2: Configure the HTTP listener of httpconndemoFlow for the GET method as:
Image title

Step 3: Add a set payload transformer and a logger just after it, then add values for the respective fields specified below:
Image title
Step 4: Check the XML configuration:
<?xml version="1.0" encoding="UTF-8"?>
<mule xmlns="http://www.mulesoft.org/schema/mule/core" version="EE-3.8.0">
    <http:listener-config xmlns:http="http://www.mulesoft.org/schema/mule/http" xmlns:doc="http://www.mulesoft.org/schema/mule/documentation" name="HTTP_Listener_Configuration" host="0.0.0.0" port="8081" basePath="/httpdemo" doc:name="HTTP Listener Configuration">    </http:listener-config>
    <flow name="httconndemoFlow">
        <http:listener xmlns:http="http://www.mulesoft.org/schema/mule/http" xmlns:doc="http://www.mulesoft.org/schema/mule/documentation" config-ref="HTTP_Listener_Configuration" path="/" allowedMethods="G" doc:name="HTTP">    </http:listener>
        <set-payload xmlns:doc="http://www.mulesoft.org/schema/mule/documentation" value="#['This is a sample payload']" doc:name="Set Payload">    </set-payload>
        <logger xmlns:doc="http://www.mulesoft.org/schema/mule/documentation" message="#['LOGGER_MSG- '+message.payload]" level="INFO" doc:name="Logger">   </logger>
    </flow>
</mule>

Step 5: Start testing in your browser and check logger messages in the Mule console:
Image title

Conclusion

There you have it! We have seen how an HTTP connector works as a listener. Similarly, an HTTP requester can be configured and used the same way.
An HTTP listener can be configured for different HTTP methods — GET, POST, etc. Obviously, I went with the GET method for this demonstration.

MuleSoft: Using a Groovy Component

While working with MuleSoft, we would often like to pause process execution for while and continue later. Normally in Java, we can use the sleep() method to achieve that. But with Mule, the Groovy component has the answer.

Sample Use Case

Let's consider a flow where a file component will poll files from a particular location and will push them to specified target location. We would like to hold the file for a particular interval (say three seconds) and then push it outbound.
Image title

Implementation

We can achieve that by using the Groovy component, followed by implementating the sleep method within it. 
1. First, create a Mule project followed by a flow-apstartFlow1.
2. Add and configure the file component as inbound and outbound. Add a Groovy component between the two file components:
Using groovy component

3. Add a script in the Groovy configuration:
Image title

4. Save and run the application.
5. The console log will contain the message specified in the script:
Image title
Note: I have used Mule runtime 3.8 while taking the screenshots.
So, with that, we have seen that the Groovy component is useful for implementing some custom business requirements.

Import RAML Directories in Postman Directly

APIs designing with RAML (Rest API Modelling language) has become a new alternative for developers these days. API lead connectivity has become a new trend in enterprise applications connectivity. Industry level CIOs and CTOs have identified this to some extent, and so are promoting it at a large scale. With Mulesoft, developers find it pretty easy to design and develop an API and go for their connectivity.
Postman is an http requester tool that helps developers with API testing. There is good news for developers with version 3.1+: Postman can detect all RAML API definitions inside a folder and import all of them. The current version of the importer supports version 0.8 of the RAML spec.
Below is a sample use case:

Clone the GitHub RAML Definition

$ git clone https://github.com/raml-apis/GitHub.git

Open the Postman import dialog

Image title
You’ll see the import dialog, as shown below. Notice the new “Folder” tab.
Image title
Now import a directory/folder
Click on “Choose,” select the folder we just cloned (“Github”), and then hit “Upload”.
Image title
Now, Postman will detect all the RAML definitions, convert them internally to Postman
Collections, and then show you the import success message.
Image title
Postman’s folder importer can also import all files that are Postman Collections, or Postman Environments. This makes it easier to import multiple collections and their associated environments into Postman.
I hope this will help developers importing the RAML directory.